
Complete Installation & Configuration Guide for ZKTeco Biometric Attendance Systems
Are you struggling with inaccurate attendance records, time theft, or buddy punching in your workplace? You're not alone. Traditional attendance methods cost businesses in Dubai an average of 5–7% of their annual payroll due to time fraud and administrative errors.
ZKTeco biometric attendance systems eliminate these challenges completely but only when installed and configured correctly. A poorly set up system leads to frustrated employees, rejected fingerprints, connectivity issues, and wasted investment.
This comprehensive guide from ByteFlow, built from real-world installation experience across hundreds of deployments in Dubai and the UAE, walks you through the complete installation and configuration process for all major ZKTeco models. From selecting the right mounting location for Dubai's climate to configuring network settings that work with your existing IT infrastructure, every recommendation here is tested and proven.
Who This Guide Is For
IT managers deploying attendance systems for the first time
Business owners looking to eliminate time theft and streamline payroll
HR professionals responsible for workforce management technology
Facility managers upgrading from card-based systems
Technical staff handling device installation and maintenance
What You'll Achieve
By following this guide, you'll install a fully functional biometric attendance system with accurate user enrollment, reliable network connectivity, seamless software integration, and automated attendance reporting with minimal maintenance requirements.
Table of Contents
1. Pre-Installation Planning
Site Survey Checklist
Location Requirements:
Choose areas with stable temperature (0°C to 45°C for most models)
Avoid direct sunlight exposure on fingerprint or facial recognition sensors
Ensure height accessibility: mount devices at 120–150cm from floor level
Select locations with minimal dust and moisture
Verify adequate lighting for facial recognition models (minimum 100 lux)
Network Infrastructure:
Confirm available power outlets (220V AC for most models)
Check network connectivity: Ethernet ports or stable WiFi signal
Verify IP address availability in your network
Ensure firewall permissions for device communication
Choosing the Right ZKTeco Device
Each ZKTeco model is built for a different environment and user load. Here's a closer look at what each one offers:
UA300:Fingerprint-only recognition, supports up to 3,000 users and 3,000 fingerprint records, 100,000 transaction storage, 2.8" TFT display, TCP/IP and USB connectivity, operates in 0°C to 45°C. Best for small offices and retail shops.
UA760:Fingerprint-only recognition, up to 3,000 users and 4,000 fingerprint records, 100,000 transaction storage, 2.8" TFT display, TCP/IP and USB connectivity, 0°C to 45°C range. Best for small to medium offices.
G5:Face, fingerprint, and card recognition, up to 10,000 users and 10,000 fingerprint records, 200,000 transaction storage, 4.3" touchscreen, TCP/IP, WiFi, and 4G connectivity, 0°C to 45°C range. Best for high-security facilities.
G4 Pro:Face and fingerprint recognition, up to 3,000 users and 6,000 fingerprint records, 100,000 transaction storage, 4.3" touchscreen, TCP/IP and WiFi connectivity, 0°C to 45°C range. Best for corporate offices.
UA860:Fingerprint-only recognition, up to 10,000 users and 10,000 fingerprint records, 200,000 transaction storage, 2.8" TFT display, TCP/IP and USB connectivity, 0°C to 45°C range. Best for large enterprises.
FaceDepot 4A:Touchless facial recognition (no fingerprint option), up to 3,000 users, 50,000 transaction storage, 8" touchscreen, TCP/IP, WiFi, and cloud connectivity, 0°C to 40°C range. Best for hospitals, restaurants, and hygiene-critical environments.
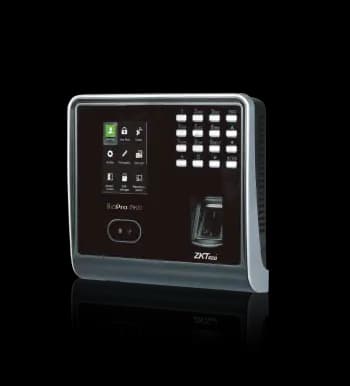
BioPro MH40:Face and fingerprint recognition, up to 5,000 users and 5,000 fingerprint records, 100,000 transaction storage, 5" touchscreen, TCP/IP and WiFi connectivity, rated for -20°C to 60°C. Best for construction sites and factories.
BioPro MH30:Face and fingerprint recognition, up to 3,000 users and 3,000 fingerprint records, 50,000 transaction storage, 4.3" touchscreen, TCP/IP and WiFi connectivity, rated for -20°C to 60°C. Best for outdoor entry points.
BioPro MH20:Face and fingerprint recognition, up to 1,500 users and 1,500 fingerprint records, 30,000 transaction storage, 2.8" TFT display, TCP/IP and USB connectivity, rated for -20°C to 60°C. Best for small outdoor gates.
Horus E1:AI facial recognition (no fingerprint option), up to 50,000 users, 100,000 transaction storage, 7" touchscreen, TCP/IP, WiFi, and 4G connectivity, 0°C to 45°C range. Best for premium corporate headquarters.
Horus E2:AI facial recognition plus fingerprint, up to 30,000 users, 100,000 transaction storage, 8" touchscreen, TCP/IP, WiFi, and 4G connectivity, rated for -20°C to 60°C. Best for large outdoor facilities.
M6:Fingerprint-only recognition, up to 1,000 users and 1,000 fingerprint records, 80,000 transaction storage, compact 2.4" TFT display, TCP/IP and USB connectivity, 0°C to 45°C range. Best for startups and branch offices.
Quick selection guide:
UA300 & UA760:Best for small to medium offices (up to 3,000 users)
G5 & G4 Pro:Ideal for high-security environments requiring multi-modal verification
UA860:Suitable for large enterprises (up to 10,000 users)
FaceDepot 4A:Perfect for touchless attendance in healthcare or food industries
BioPro MH Series:Outdoor-rated for harsh environments
Horus E1/E2:Advanced AI facial recognition for premium installations
M6:Compact solution for small teams or multiple entry points
2. Tools and Materials Required
Hardware Tools
Phillips and flathead screwdrivers
Power drill with masonry bits (6mm and 8mm)
Wall plugs and screws (typically M6 x 40mm)
Spirit level for alignment
Cable tester (for network verification)
Measuring tape
Materials
Cat6 Ethernet cable (if using wired connection)
Cable conduit or trunking for neat installation
Power surge protector
Cable ties and clips
Silicone sealant (for outdoor installations)
Software Requirements
ZKTeco ZKAccess 3.5 or BioTime 8.5 software
Latest device firmware (from ZKTeco's official website)
Windows PC with administrator privileges
Network scanning tool (Advanced IP Scanner recommended)
3. Device Installation Steps
Step 1: Unboxing and Inspection
Open the package and verify contents against the packing list. Check for shipping damage and confirm included items: device unit, power adapter, mounting bracket, installation screws, quick start guide, and warranty card. Keep the serial number accessible for registration.
Step 2: Mounting Bracket Installation
For Wall Mounting:
Mark the mounting position using the bracket template
Use a spirit level to ensure the bracket is perfectly horizontal
Drill holes at marked positions with the appropriate bit size
Insert wall plugs firmly into the drilled holes
Secure the bracket with screws, ensuring it's firmly attached
For outdoor models (BioPro series, Horus E2), apply weatherproof sealant around mounting points
For Turnstile or Stand Mounting:
Align the device bracket with the turnstile mounting plate
Use manufacturer-provided bolts to secure the connection
Ensure all connections are tight and stable
Step 3: Device Attachment
Align the device with the mounted bracket, slide or click it into position, and secure with the provided locking screws to prevent tampering. Verify it's firmly attached and level.
Step 4: Power Connection
Connect the power adapter, route cables through conduit for a clean finish, and plug into a surge-protected outlet. The device should boot within 30–60 seconds and display the home screen.
Step 5: Network Connection
Wired (Recommended): Connect a Cat6 cable from the device to your switch/router. Confirm the LED indicator is lit. Cable runs shouldn't exceed 100 meters without a repeater.
WiFi: Go to Menu → System → Network → WiFi, scan for networks, select your SSID, enter the password, and confirm the assigned IP address.
4. Network Configuration
Step 1: Accessing Device Settings
Navigate to Menu → Settings → Communication, enter the administrator password (default is typically 123456 or admin), and select Network Settings or TCP/IP.
Step 2: IP Address Configuration
Static IP (recommended for stability):
Set IP Address Mode to "Static"
Enter an available IP address (e.g., 192.168.1.150)
Set Subnet Mask (typically 255.255.255.0)
Enter Default Gateway (usually 192.168.1.1)
Set Primary DNS (e.g., 8.8.8.8)
Save and reboot
Dynamic IP (DHCP): Set mode to "DHCP," note the auto-assigned IP, and reserve it in your router's DHCP settings.
Step 3: Network Testing
From a computer on the same network, run ping [device IP address] in Command Prompt. Successful replies confirm connectivity; if it fails, recheck IP settings and cabling.
Step 4: Port Configuration
Ensure the device port is set to 4370 (ZKTeco default), configure router port forwarding for remote access, and add the device IP to your firewall exceptions.
5. Software Setup and User Enrollment
Step 1: Installing ZKTeco Management Software
Download ZKAccess 3.5 or BioTime 8.5 from the ZKTeco official website, run the installer with admin privileges, and complete the setup wizard.
Step 2: Adding Devices to Software
Open Device Management → Add Device / Search Device
Select your device from the network scan results
Enter device name, IP address, port (4370), and password
Click Connect and confirm online status
Step 3: User Enrollment
Method 1 :Direct Device Enrollment (best for small teams)
Go to Menu → User Management → New User
Enter a unique User ID and full name
Assign an RFID card number if applicable
Fingerprint: Place the same finger on the sensor 3 times; enroll at least 2 fingers per user for redundancy; ensure fingers are clean and dry
Facial Recognition: Position the face in the guide frame at 30–50cm, keep a neutral expression, and remove glasses if prompted
Set privilege level and save
Method 2 :Software-Based Enrollment (better for large organizations)
Go to Personnel → Add Personnel and enter employee details
For fingerprints: connect a USB reader to the PC and follow enrollment prompts
For faces: use the device camera or upload a high-quality photo
Assign access privileges and schedules, then click Upload to Device
Step 4: Configuring Attendance Rules
Define shifts (name, clock-in/out windows, breaks), overtime rules, late/early thresholds, and holiday/leave policies, then apply them to employees or departments.
Step 5: Setting Up Reporting
Configure automatic reports (daily summary, monthly timesheet, late arrivals, overtime, absentees) with email notifications and scheduled delivery to HR.
6. Testing and Troubleshooting
Testing Checklist
Day 1:
Test each user's biometric verification (minimum 5 attempts per user)
Verify records appear in software within 1–2 minutes
Check timestamp accuracy against actual time
Week 1:
Monitor false rejection rates (should stay below 1%)
Track response time (should be under 1 second)
Verify network stability and backup power functionality
Common Issues and Solutions
Device Not Connecting to Network
Verify Ethernet cable and IP configuration
Confirm device and server share the same subnet
Restart device and networking equipment
Check firewall rules
Fingerprint Recognition Failure
Clean the sensor with a soft, lint-free cloth
Re-enroll fingerprints with clean, dry fingers
Reduce sensitivity threshold in device settings
Enroll multiple fingers per user
Face Recognition Failing in Low Light
Add LED lighting around the device
Adjust the brightness threshold in settings
Enable infrared mode on Horus series devices
Reposition to avoid window backlighting
Data Not Syncing to Software
Check network connection and software service status
Manually trigger data download
Clear old logs if memory is full
Sync system date/time
Slow Response Time
Keep enrolled users under the device's capacity limit
Delete unused accounts and old records
Update firmware
Distribute load across additional devices
7. Maintenance Best Practices
Daily: Wipe the sensor surface with a microfiber cloth to remove dust and fingerprints, verify the device is displaying the correct time, and do a quick visual inspection for physical damage or tampering.
Weekly: Back up attendance data to a server or cloud storage, review system logs for errors or anomalies, test a sample of user verifications, clean the device screen, and inspect cable connections for looseness.
Monthly: Deep clean all sensors and optical components, update firmware if new versions are available, remove terminated employees from the user database, check storage capacity and archive old data, test backup power supply functionality, and review access logs for security concerns.
Quarterly: Run a comprehensive system audit, update the management software, re-train users if needed, inspect mounting hardware for looseness, review attendance policies, and conduct a disaster recovery drill.
Annual: Schedule professional calibration of biometric sensors, a complete system health check by a certified technician, replacement of worn components, a capacity review for future expansion, and a security credentials update.
Expert Tips for Optimal Performance
Fingerprint Quality Matters: Enroll fingerprints mid-day when hands are neither too dry nor too moist for the most reliable templates.
Network Stability is Critical: Use wired connections for fixed locations; reserve WiFi for portable or temporary setups.
User Training is Essential: A 15-minute training session on proper biometric presentation can reduce common verification issues by roughly 80%.
Strategic Device Placement: Position devices where users naturally slow down, not at fast-moving doorways, to improve recognition accuracy.
Regular Data Archival: Schedule monthly archival to keep device memory below 70% utilization.
Redundancy Planning: For critical access points, consider dual devices or hybrid verification to avoid downtime during maintenance.
When to Contact Professional Support
While this guide covers most scenarios, contact ByteFlow or ZKTeco certified support when:
Installing systems for more than 500 users
Integrating with existing access control or HR systems
Deploying across multiple locations with centralized management
Requiring custom reporting or compliance features
Experiencing persistent technical issues after troubleshooting
Planning system expansion or major upgrades
Frequently Asked Questions
How long does it take to install a ZKTeco biometric attendance system?
Installation time varies by complexity. A single device with basic configuration takes 2–3 hours including mounting, network setup, and initial testing. Multiple devices across several locations with software integration typically take 1–2 days, while large enterprise deployments with 10+ devices and custom integration may require 3–5 days.
Can I install a ZKTeco attendance system myself, or do I need a professional?
Small businesses with 1–2 devices and basic IT knowledge can handle installation using this guide. Professional installation is recommended for networks with more than 50 users, integrations with existing HR or payroll software, outdoor installations in harsh environments, or multi-location deployments, since it ensures optimal performance and maintains warranty coverage.
Should I use WiFi or wired Ethernet for my attendance device?
Wired Ethernet is recommended for permanent installations because it offers stable connectivity, avoids interference, and speeds up data synchronization. Reserve WiFi for temporary installations, locations where cabling is impractical, or devices that need to be relocated.
Is biometric data stored securely? Can it be stolen?
ZKTeco devices store biometric templates, mathematical representations rather than actual fingerprint or face images, so they can't be reverse-engineered into the original biometric. Data is encrypted with AES-256 both in storage and during transmission, with password-protected admin access, secure communication protocols (HTTPS/SSL), and local storage by default (no automatic cloud upload). This complies with GDPR and UAE data protection regulations.
Conclusion
Proper installation and configuration of ZKTeco biometric attendance systems ensures accurate time tracking, enhanced security, and streamlined workforce management. Following this guide will help you establish a reliable system that serves your organization for years to come with ROI typically achieved within the first year of operation, based on ByteFlow's experience across hundreds of installations in Dubai and the UAE.
About ByteFlow
Services:
Professional installation and configuration
Custom software integration
Ongoing technical support and maintenance
User training and documentation
System upgrades and expansion
IT AMC support
Contact ByteFlow:
Phone: +971 54 328 2042
Email: info@byteflow.ae
Website: www.byteflow.ae
Need help with your installation? Contact our expert team for professional installation services, technical support, or a consultation on the best biometric solution for your business.
Have an IT problem you need solved?
Reading about it is one thing. Getting it fixed is another. Our team responds within 2 hours.